
3D Models & Texturing
3D Epson Ecotank Printer Model
3D Modeling & Texturing


My first CGI professor wanted me to create a 3-Dimensional Model with at least one moveable part, and I immediately knew my Epson Printer would work best with three moveable parts. Modeled in Maya and slight texturing in substance, I made a life-sized Epson Ecotank with a moveable distribution tray, moveable paper tray, and the command pad that can be rotated upwards to check the back of the printer.
3D Recreation of Tom McNemar’s Still-Life
3D Modeling & Texturing


I wanted to recreate Tom McNegar’s Butcher Still Life, on the left, as a 3D scene in Maya, on the right. I played with lighting, model arrangement, and textures to try and recreate the scene. To re-capture the effects from the original, I’d paint some specular roughness on parts for an extra shine, recreate engravings in the boards, and painted the same scratches and height in the bowl and woods to maintain color range and consistency
3D Character Sculpt
3D Modeling & Texturing
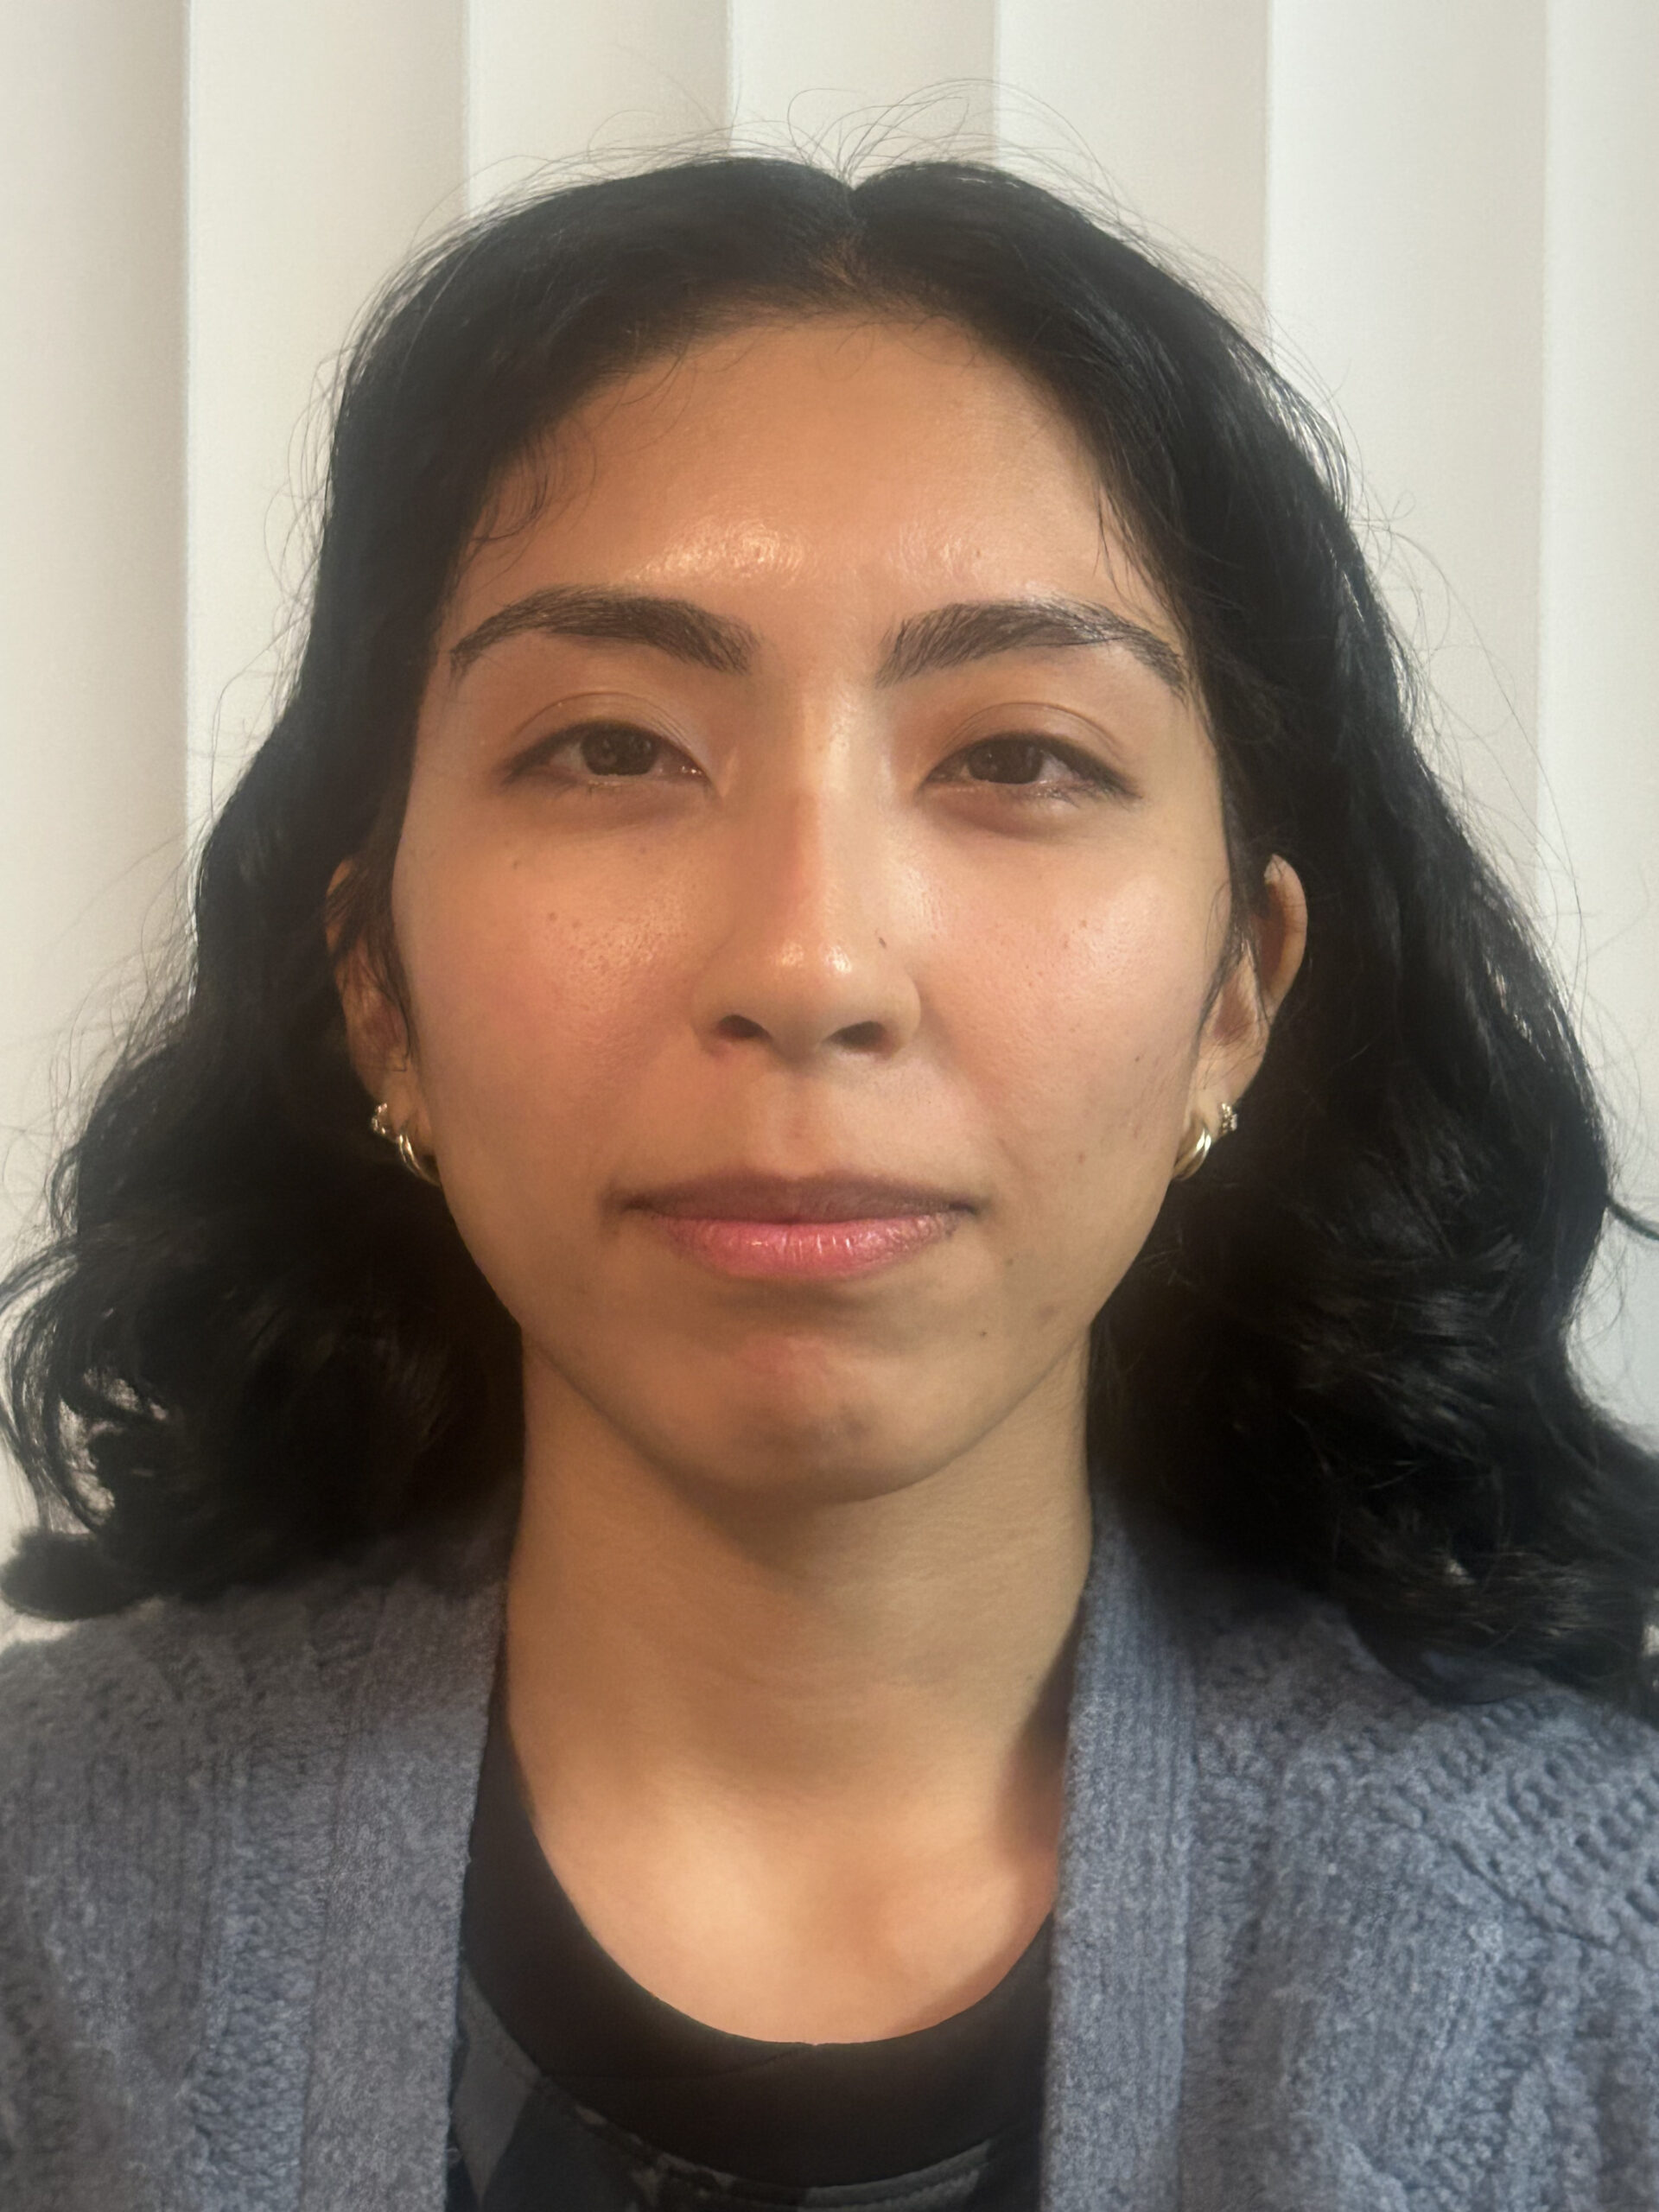
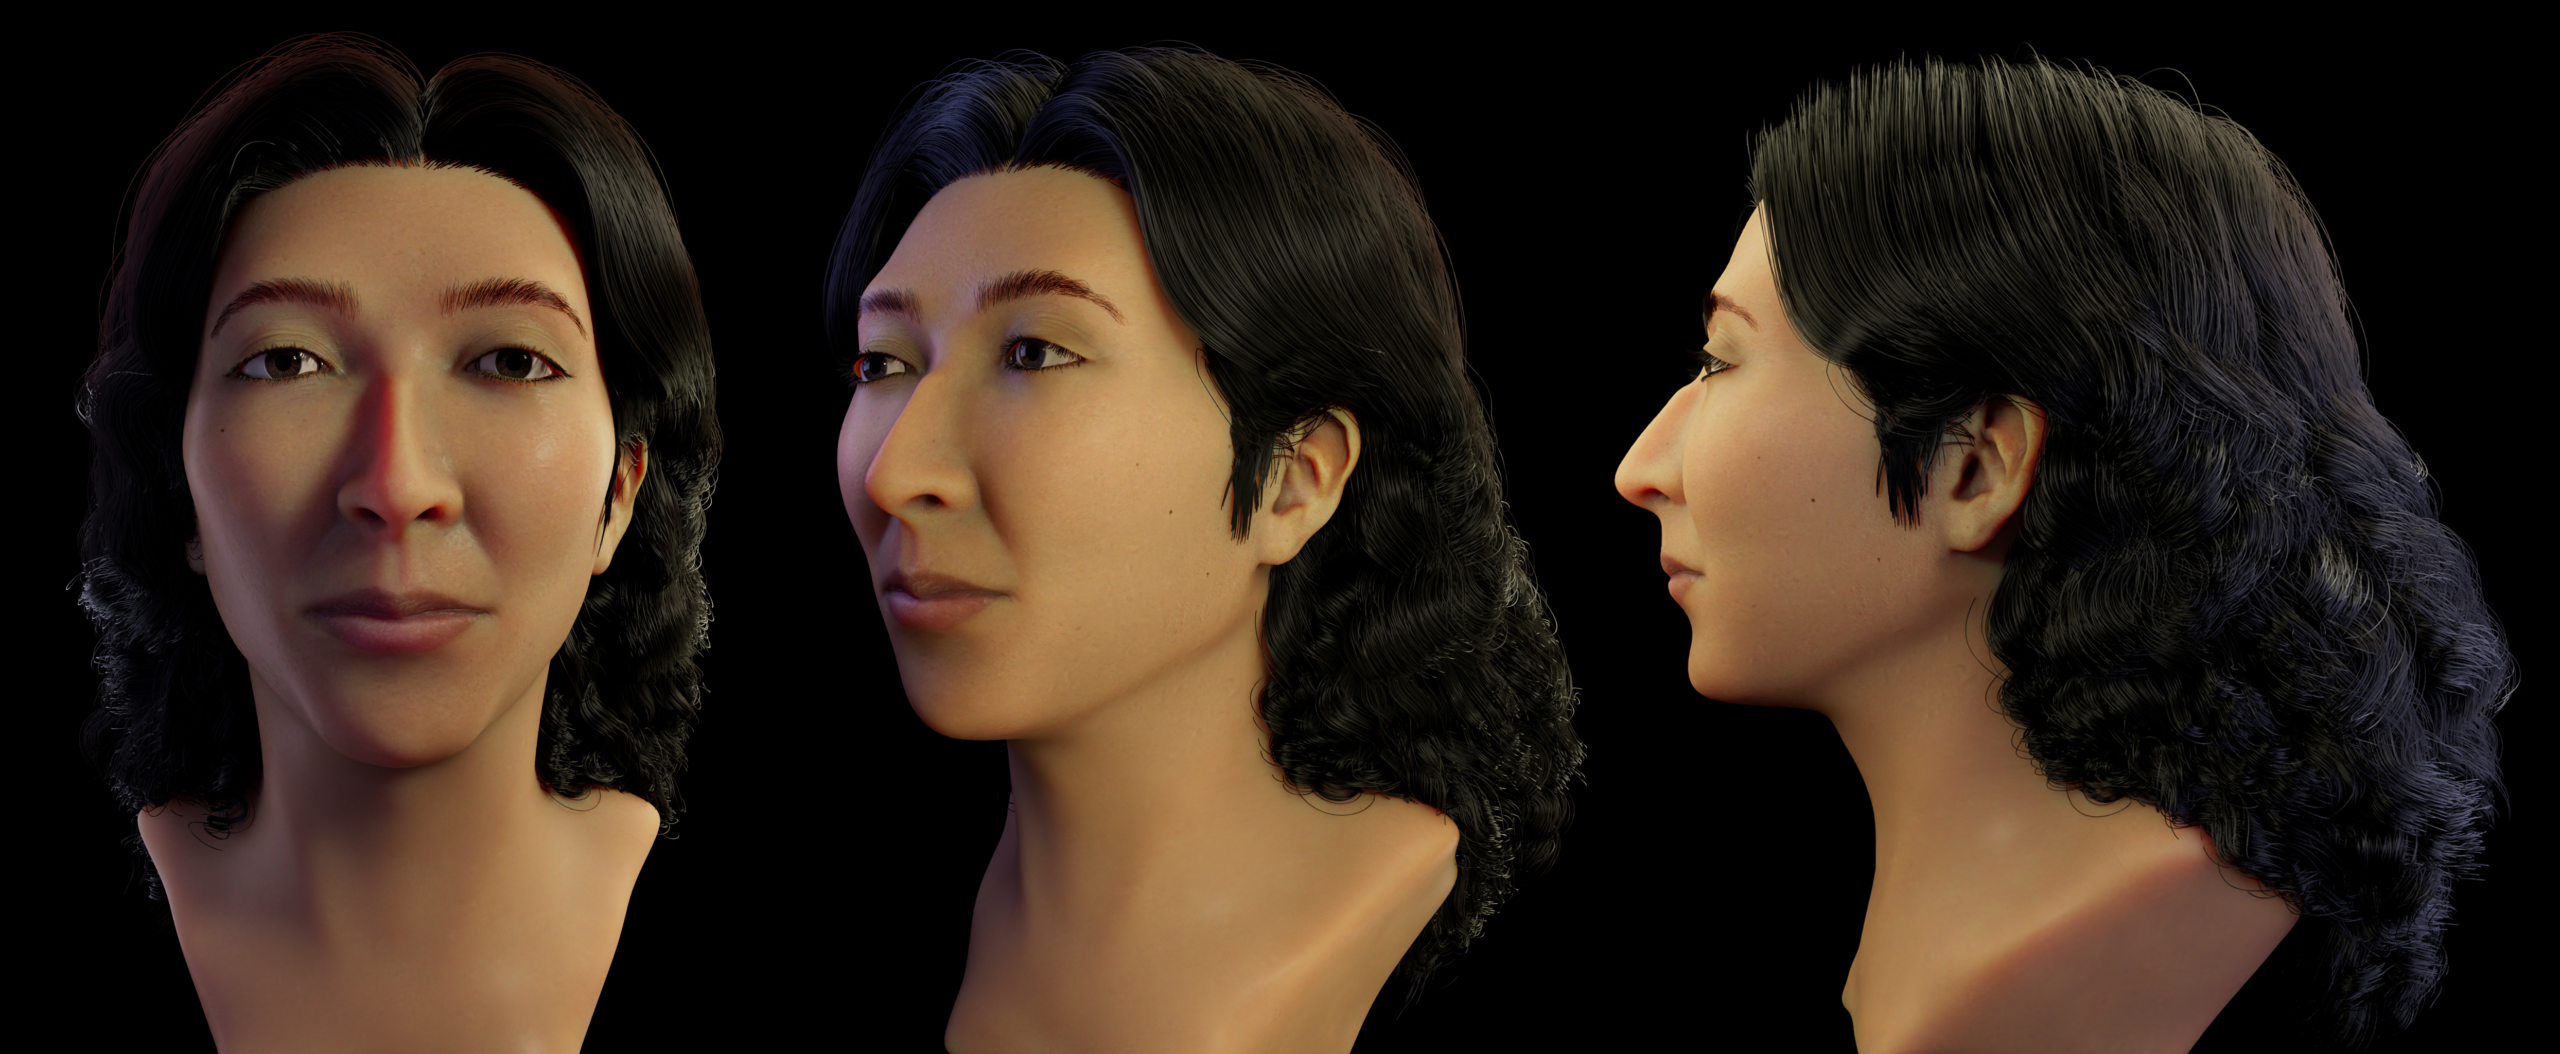
I took reference photos with a colleague of mine with the plan to recreate her in 3D. I took the reference photos into Zbrush and sculpted a starter head into the shape of her face, and once I was done, I’d import the mesh into Maya to clean up the topology for further touches/ polish. While in Maya,. I set up the different parts of the eye and the skin mesh for texturing. For the eyes, I used a preset-iris png and tuned it to match the color of her eyes, and used a cornea png to clone the veins and lay them out based on the UV maps.
For the skin texturing, I’d take extra photos of my colleague in a neutral light source up close for accurate texturing, take the photos into photoshop and create a face wrap with front, 3/4, and side views to have a variety of skin texture, lips, ears, eyelids, and freckles to apply to the mesh. I’d bring the mesh into Mari to apply the wrap to, and I’d create an AO so the dimensions of the mesh would reflect the shading/ highlights of the textures. Following that, I’d use Maya’s hair simulation to create guides that matched the coils and length of the hair, playing with width, density, and direction to match the hair, eyebrows, and eyelashes my colleague has (The hair took up most of Maya’s processing, so I’d lower the amount of urves in the hair to 50 till it was time to render.)
Finally, when everything was complete, I brought it all together into Maya and added the skin, eye, and hair shaders to the mesh, and ensured they were Arnold materials for Arnold rendering. I created different lights/ sets for each profile I planned to render the head at, and proceeded to render each profile at 1550×2048 so I could assemble the side by side in photoshop for final viewing.